ShaderでImageをかき混ぜる
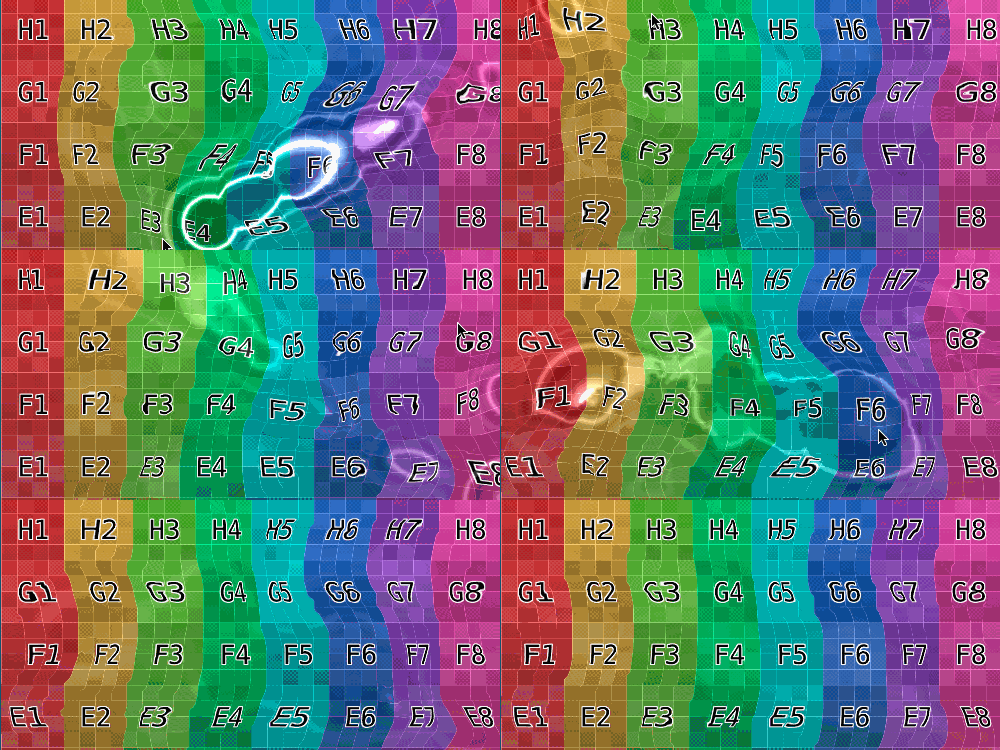
ShaderでImageをかき混ぜる様なShaderの勉強。
移動量のベクトル値を記録するテクスチャの作成
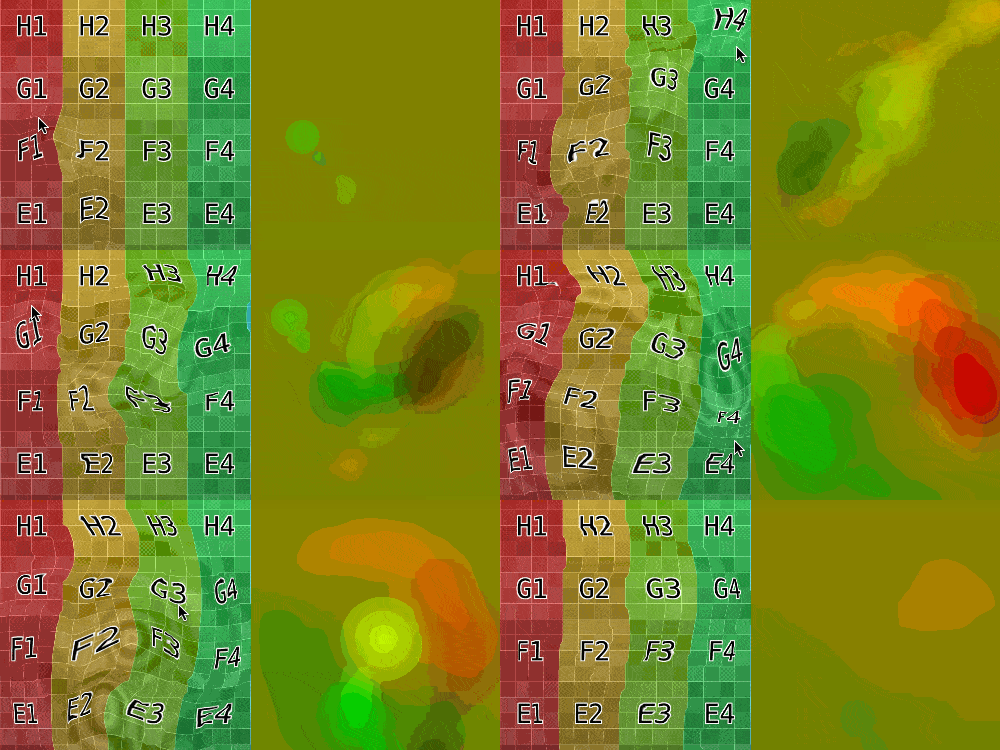
まずは、コンポーネント側で現在のマウス座標と以前のマウス座標を比較して移動ベクトルをTexture2Dに書き込む。
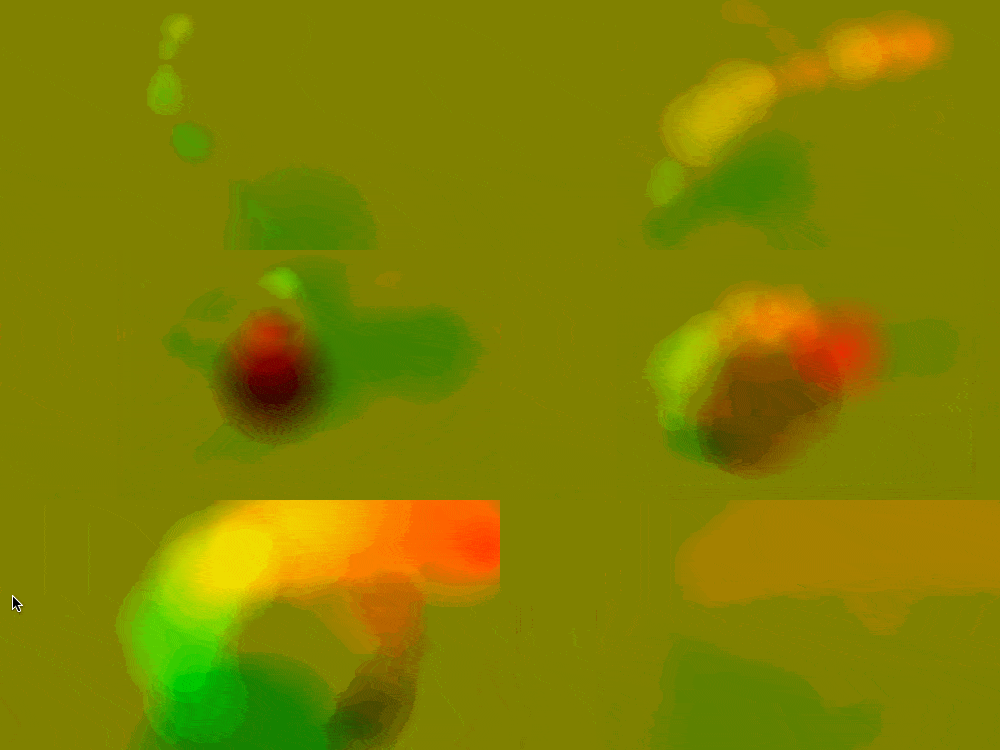
こんな感じのテクスチャになるようにTexture2DにSetPixel()で値を入れていき、さらに波紋の様に周りのピクセルに影響が出る様に調整。
using UnityEngine;
using UnityEngine.UI;
using System.Collections.Generic;

public class SetMouseVector2Shader : MonoBehaviour {
	/// <summary>
	/// マウスの移動奇跡を記録しているテクスチャを表示したい場合に設定。
	/// </summary>
	[SerializeField]
	Image previewImage;

	/// <summary>
	/// マウスの移動軌跡をShaderに伝えるためのエクスチャ。
	/// </summary>
	Texture2D touchTex;

	/// <summary>
	/// マテリアル。
	/// </summary>
	Material material;

	/// <summary>
	/// イメージ。
	/// </summary>
	Image image;

	/// <summary>
	/// RectTransform.
	/// </summary>
	RectTransform rectTrans;

	/// <summary>
	/// 記録用テクスチャと本Imageとの比率。
	/// </summary>
	Vector2 ratio;
	Vector2 inverseRatio;

	/// <summary>
	/// 前の座標。
	/// </summary>
	Vector2 prevPos;

	/// <summary>
	/// Start.
	/// </summary>
	void Start () {
		this.image = this.GetComponent<Image> ();
		this.rectTrans = this.GetComponent<RectTransform> ();
		this.material = this.GetComponent<Image> ().material;
		this.touchTex = new Texture2D (128, 128);
		this.touchTex.wrapMode = TextureWrapMode.Clamp;
		this.prevPos = this.rectTrans.InverseTransformPoint (Input.mousePosition);

		this.ratio = new Vector3 (this.touchTex.width / this.rectTrans.sizeDelta.x, this.touchTex.height / this.rectTrans.sizeDelta.y);
		this.inverseRatio = new Vector2 (1f / this.ratio.x, 1f / this.ratio.y);;

		// x側のベクトルををred、y側をgreenに設定し、移動量0を0.5とする
		for (int y = 0; y < this.touchTex.height; ++y) {
			Color[] colors = new Color[this.touchTex.width];
			for (int i = 0; i < colors.Length; ++i)
				colors [i] = new Color(0.5f, 0.5f, 0f);

			this.touchTex.SetPixels (0, y, this.touchTex.width, 1, colors);
		}
		this.touchTex.Apply ();

		// プレビューする場合
		if (this.previewImage != null) {
			this.previewImage.sprite = Sprite.Create (this.touchTex, new Rect (0, 0, this.touchTex.width, this.touchTex.height), Vector2.zero);
			this.previewImage.GetComponent<RectTransform> ().sizeDelta = this.rectTrans.sizeDelta;
		}
	}

	/// <summary>
	/// Update.
	/// </summary>
	void Update () {
		// 固定値
		float easing = 0.1f;
		float maxR = 100f;

		Vector2 localPos = this.rectTrans.InverseTransformPoint (Input.mousePosition);
		Vector2 drawPos = new Vector2 (Mathf.Round (localPos.x * this.ratio.x), Mathf.Round (localPos.y * this.ratio.y));
		Vector2 v = localPos - this.prevPos;
		Vector2 normalV = v.normalized;

		float radius = v.magnitude;

		if (radius > maxR) {
			radius = maxR;
			v = v.normalized * maxR;
		}

		float radius2 = radius * radius;

		// 全ピクセルを総なめ
		for (int x = 0; x < this.touchTex.width; ++x) {
			for (int y = 0; y < this.touchTex.height; ++y) {
				// 移動奇跡の影響を弱めていく
				Color c = this.touchTex.GetPixel (x, y);

				float r = c.r;
				float g = c.g;

				if (r != 0.5f && g != 0.5f) {
					r += easing * (0.5f - r);
					g += easing * (0.5f - g);

					if (Mathf.Abs(r - 0.5f) < 0.05f)
						r = 0.5f;
					if (Mathf.Abs(g - 0.5f) < 0.05f)
						g = 0.5f;
				}


				// 指定の半径内で中心に近いほど影響を強くする
				float distance2 = (localPos - new Vector2 (x * this.inverseRatio.x - this.rectTrans.sizeDelta.x/2f, y * this.inverseRatio.y - this.rectTrans.sizeDelta.y/2f)).sqrMagnitude;

				if (distance2 < radius2) {
					float strength = 1 - Mathf.Sqrt(distance2) / radius;
					r += v.x * 1f/maxR * strength;
					g += v.y * 1f/maxR * strength;
				}


				// 隣接しているピクセルに影響
				float effect = 0.01f;

				for (int xx = Mathf.Max (0, x - 1); xx <= Mathf.Min (this.touchTex.width, x + 1); ++xx) {
					for (int yy = Mathf.Max (0, y - 1); yy <= Mathf.Min (this.touchTex.height, y + 1); ++yy) {
						if (xx == x && yy == y)
							continue;

						int distance = Mathf.Abs (xx - x) + Mathf.Abs (yy - y);

						r += (this.touchTex.GetPixel (xx, yy).r - 0.5f) * (distance == 1 ? effect : effect * 0.7f);
					}
				}

				this.touchTex.SetPixel (x, y, new Color(Mathf.Clamp01(r), Mathf.Clamp01(g), 0f));
			}
		}

		this.touchTex.Apply ();

		this.image.material.SetVector ("_Touch", localPos);
		this.image.material.SetTexture ("_TouchMap", this.touchTex);

		this.prevPos = localPos;
	}
}
渡されたテクスチャを使ってフラグメントシェーダー内でピクセルの移動
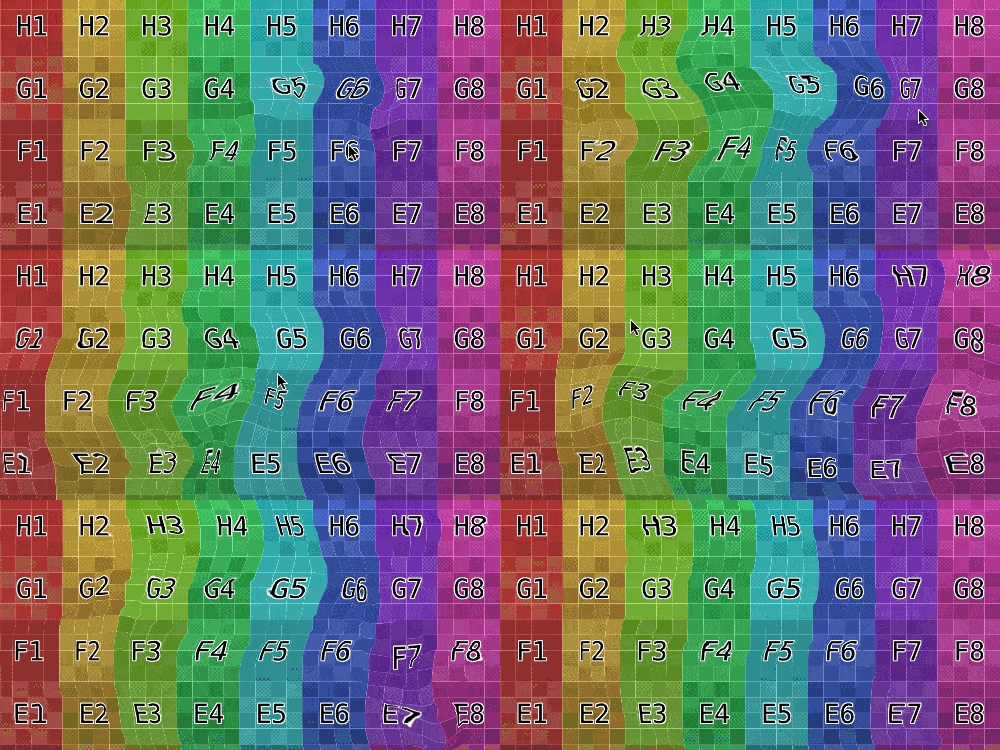
渡されたベクトル情報のテクスチャを使って、UI-Default.shaderのフラグメントシェーダーを書き換えて、テクスチャが動くように。
fixed4 frag(v2f IN) : SV_Target
{
	float adj = 0.1;
	float moveX = 0.0;
	float moveY = 0.0;
	float2 gap = IN.worldPosition - _Touch;
	half4 touchC = tex2D(_TouchMap, IN.texcoord);

	moveX += adj * ((touchC.r - 0.5));
	moveY += adj * ((touchC.g - 0.5));

	float2 move = float2(-moveX, -moveY);

    half4 color = (tex2D(_MainTex, IN.texcoord + move + _TextureSampleAdd)) * IN.color;

    color.a *= UnityGet2DClipping(IN.worldPosition.xy, _ClipRect);

    #ifdef UNITY_UI_ALPHACLIP
    clip (color.a - 0.001);
    #endif

    return color;
}
明暗をつける
移動量から適当な定数をかけ、それをsin()を使って波紋となるような明るさを作成し、それをrgbに加算。
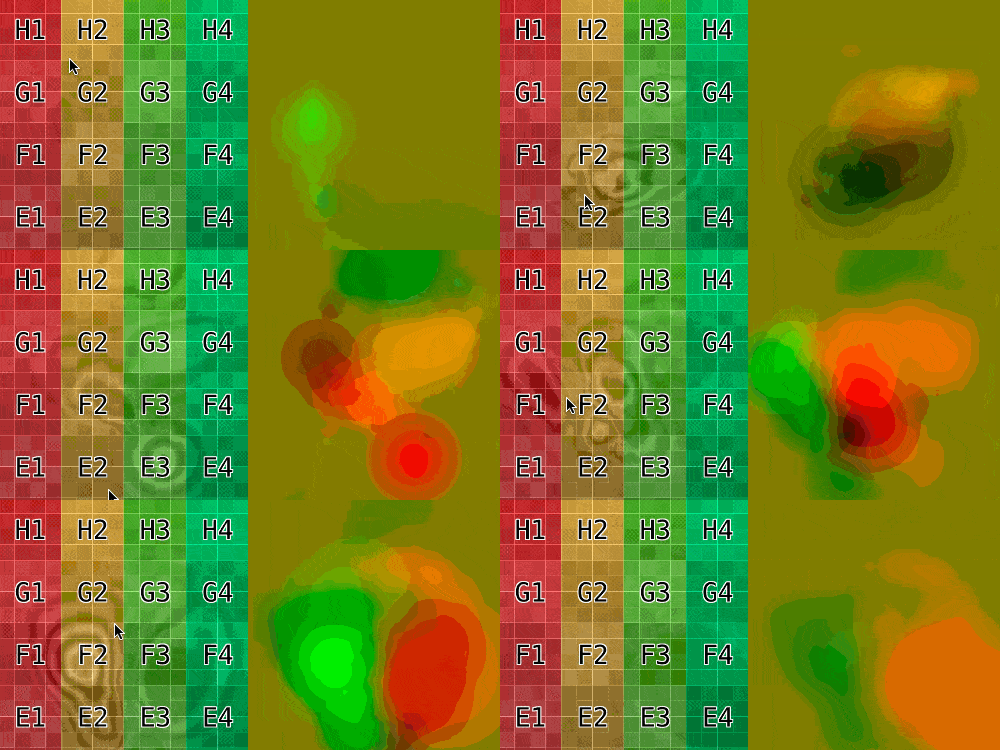
動きと合わせて見るとこんな感じ。
fixed4 frag(v2f IN) : SV_Target
{
	float adj = 0.1;
	float moveX = 0.0;
	float moveY = 0.0;
	float2 gap = IN.worldPosition - _Touch;
	float brightGap = 0.0;
	half4 touchC = tex2D(_TouchMap, IN.texcoord);

	moveX += adj * ((touchC.r - 0.5));
	moveY += adj * ((touchC.g - 0.5));

	float2 move = float2(-moveX, -moveY);
	float moveTotal = abs(moveX) + abs(moveY);

	brightGap = 1.5 * moveTotal * (sin(-80 * (moveTotal) * UNITY_PI));

	half4 color = (tex2D(_MainTex, IN.texcoord + move + _TextureSampleAdd)) * IN.color;

	color.a *= UnityGet2DClipping(IN.worldPosition.xy, _ClipRect);
	color.rgb += brightGap;

	#ifdef UNITY_UI_ALPHACLIP
	clip (color.a - 0.001);
	#endif

	return color;
}
明暗の調整
明るい部分をもっと強調させるため、brightGapの計算を調整値をかけるのではなく、easeInOutExpo的な強調の仕方に変更。
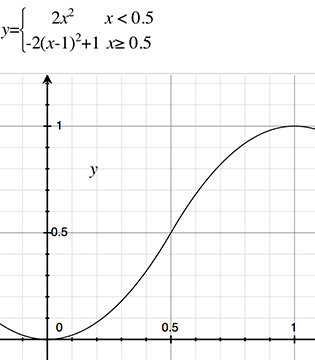
暗い部分は暗過ぎてしまうので、調整値をかけて弱めるように。
// 変更箇所
brightGap = clamp(-1.0, 1.0, 8 * moveTotal * (sin(-80 * (moveTotal) * UNITY_PI)));
if (brightGap <= 0.5)
	brightGap = sign(brightGap) * 2 * brightGap * brightGap;
else
	brightGap = sign(brightGap) -2 * (brightGap - 1) * (brightGap - 1) + 1;

if (brightGap < 0) brightGap *= 0.2;

コメントを残す